 Reviews


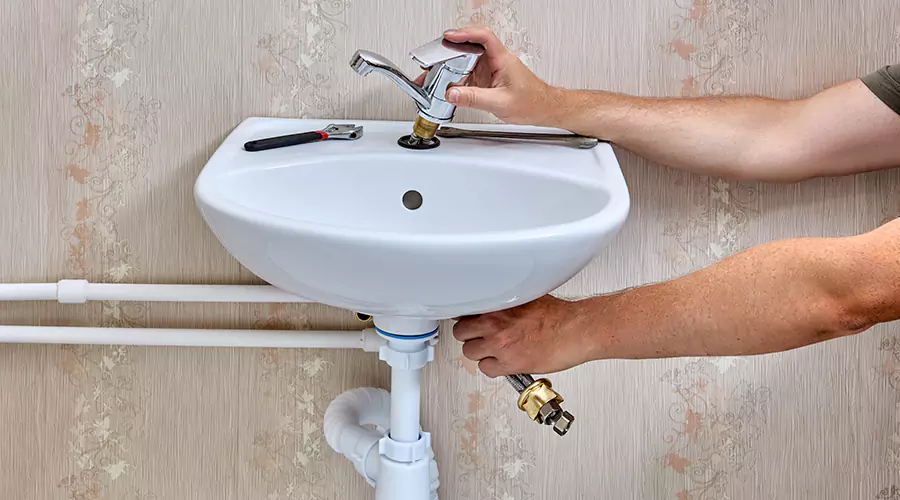
A DIY faucet installation takes one to two hours indoors and under an hour outdoors with $10 in supplies beyond the fixture. Professionals charge $150 to $450 for an indoor faucet installed and around $325 for a standard outdoor replacement.
Indoor and outdoor jobs share one skill: sealing threaded connections. Everything else differs enough that this guide splits them cleanly.
Start with the tools section either way. The same short list covers both sides of the wall.
Tools and Prep
Six tools cover every faucet in this guide. The only purchase most homeowners need is thread tape. Stage everything at the work site before any water goes off.
- Basin wrench: The long-necked tool that reaches the mounting nuts behind a sink bowl.
- Adjustable wrenches: Two of them since outdoor work needs one to hold and one to turn.
- Thread seal tape for every threaded joint on both jobs.
- Bucket and towels because every line holds leftover water.
- Flashlight or headlamp for the dark cabinet interior.
- Plumber's grease for O-rings and new cartridges.
Prep means one decision. Photograph your existing connections before touching anything so reassembly follows a picture rather than memory.
Sink Faucet Installation Step by Step
Sink faucet installation happens almost entirely on your back inside the cabinet. The hardest part of changing out a faucet is breaking the old corroded nuts loose overhead. Budget the first half of your time for demolition.
- Close both supply valves under the sink and open the faucet to drain the lines.
- Disconnect the supply lines at the valves with a bucket underneath.
- Remove the mounting nuts. The basin wrench earns its price here since replacing sink faucet hardware means working in the tight space behind the bowl.
- Lift out the old faucet and scrub the deck where it sat.
- Seat the new faucet through the holes with its gasket underneath. Hand-tighten the new mounting nuts from below and snug them a quarter turn.
- Connect fresh supply lines. A new faucet installation includes new braided lines every time because old lines fail at the crimp long before the faucet wears out.
- Open the valves slowly and run both temperatures while checking every joint.
Insider tip: A combined sink and faucet installation goes far easier with the faucet mounted to the sink before the sink drops into the counter. Working on a bench beats working blind in a cabinet.
Replacing a Faucet Aerator
The smallest faucet job fixes the most common complaint. Replacing a faucet aerator cures weak or crooked flow for under $10 in five minutes. The aerator is the screened tip that threads into the spout.
Unscrew it counterclockwise by hand or with padded pliers. Match the old one at the store since sizes and thread genders vary. Soak a mineral-crusted aerator in vinegar for an hour first because many just need cleaning rather than replacement.
New faucets hide a version of this fix too. Weak flow on day one often means installation debris caught in the screen rather than a plumbing problem.
Outdoor Faucet Installation for Threaded Bibs
Outdoor faucet installation is the simpler job when the old bib threads onto the pipe. Replacing outdoor faucet hardware of this type means one unscrewing motion and one tape wrap. Check for a hex fitting where the faucet meets the wall pipe to confirm yours threads.
- Shut the water inside: Replacing outdoor spigot hardware starts at the interior shutoff valve feeding the line. Open the outdoor faucet to drain it.
- Brace before you turn. Replacing outside faucet units takes two wrenches with one holding the supply pipe steady and one turning the faucet counterclockwise. The bracing wrench protects the pipe inside your wall.
- Clean and tape the threads: Wrap fresh tape clockwise two or three turns.
- Thread on the new bib: The core of changing an outside faucet is snug plus a quarter turn rather than maximum force.
- Test under pressure: Restore the inside valve and check the wall joint with the faucet both open and closed.
The same steps cover every naming variant. Replacing an outside faucet or an exterior hose bib follows this identical sequence, and DIY exterior spigot replacement costs $20 to $60 for the spigot plus $10 to $40 in fittings and sealant.
Insider tip: If the wall pipe turns with the faucet then stop immediately. A twisting supply pipe means soldered construction and the next section's approach.
Frost-Free and Soldered Outdoor Swaps
Two outdoor situations need more than wrenches. Replacing an exterior faucet that's soldered to copper means cutting pipe and joining new fittings. Frost-free conversions add length but pay for themselves in the first hard winter.
The frost-free math is the easiest in plumbing. Frost-free hose bibs cost $30 to $80 against $15 to $30 for standard bibs and the extra $30 to $50 is cheap insurance against a $200 to $800 freeze and burst repair. Replacing outdoor water faucet models with frost-free versions puts the shutoff seat deep inside the warm wall where ice can't reach.
Code adds one requirement. Replacing outdoor water spigot hardware in most jurisdictions now requires anti-siphon protection so buy a bib with the built-in vacuum breaker. Soldered lines move the job toward a pro or toward push-fit fittings, since replacing outside water faucet units on copper works DIY with a pipe cutter and push-connect couplings rated for outdoor use.
Placement projects scale the price. New outdoor spigot installation at a fresh location adds $100 to $250 in labor and materials for the supply run through the wall to an interior cold line.
What Faucet Installation Costs in 2026?
Faucet installation pricing splits by room and by complexity. Indoor jobs cost more than outdoor swaps because cabinet access eats labor time. The table maps every 2026 scenario.
| Job | 2026 cost |
|---|---|
| DIY indoor swap | Faucet price plus about $25 |
| Pro indoor install | $150 to $450 |
| DIY outdoor bib swap | $30 to $100 all-in |
| Pro outdoor replacement | $150 to $350 for a hose bib |
| Same-location pro swap | $75 to $200 in 30 to 60 minutes |
| New outdoor location | $190 to $415 typical |
A faucet installation service earns its fee fastest on soldered lines and new supply runs. Permits occasionally join the invoice since permit fees run $25 to $100 with inspections at $50 to $150 where required.
Mistakes That Cause Callbacks
Five mistakes account for most failed faucet jobs on both sides of the wall. Every one is cheaper to read than to repeat. None requires skill to avoid.
- Reusing old supply lines indoors: The lines cost $10 and fail catastrophically when they go.
- Skipping the bracing wrench outdoors: A twisted interior pipe turns a $30 job into a wall repair.
- Overtightening everything: Threads and gaskets seal at snug and crack past it.
- Taping backward: Tape wrapped counterclockwise unwinds as the fitting tightens.
- Leaving the hose on all winter: A connected hose traps water that splits even frost-free bibs.
When to Call a Professional
Three findings end the DIY lane on faucet work. Each involves the pipe rather than the fixture. The faucet itself never needs a license.
- Soldered connections you can't convert: Torch work near wall framing carries fire risk that push-fit can't always replace.
- Corroded shutoff valves: A supply valve that won't close needs professional replacement before any faucet work.
- A new location anywhere: Running supply through walls means code and possibly permits.
One more case deserves the call. Water stains inside the wall below an old outdoor bib mean a past freeze split the pipe and the repair scope is unknown until the wall opens.
Conclusion
Every faucet job reduces to draining a line and sealing threads and resisting the urge to overtighten. Indoor work tests your patience under a cabinet while outdoor work tests one bracing wrench. Soldered pipe and new locations belong to pros. This week check whether your outdoor bib is frost-free by looking for the long body and angled handle. The $50 upgrade decision beats a February flood.
FAQs
How do I know if my outdoor faucet threads on?
Look for a hex fitting where the faucet meets the pipe. No hex and no visible threads means soldered.
Should the outdoor bib angle down?
Yes. Frost-free bibs must pitch slightly downward toward the outlet so the barrel drains after each use.
Why does my new kitchen faucet wobble?
The mounting nuts loosened or the deck gasket seated unevenly. Snug the nuts from below with the basin wrench.
Can I install a pull-down faucet in any sink?
Nearly any with a standard hole layout. Check the hole count and spacing before buying since plates cover extras.
Do outdoor faucets need the vacuum breaker?
In most jurisdictions yes. The anti-siphon device stops hose water from backflowing into your drinking lines.
How long should a faucet last after installation?
Fifteen to twenty years indoors with cartridge changes along the way. Outdoor bibs last decades when hoses come off before winter.